LMi.net is not associated with SmartRG and can not facilitate or answer support related questions relating to this equipment for individuals or businesses who are not current internet customers.
The SmartRG DSL routers we use generally do not require any special configuration other than setting up a wireless network name and password, and the LMi.net installer will typically do this for you. If wireless settings are all you need to configure, the Quick Start guides will provide all the instructions you need. For complete documentation, you should download the full User Guide. The purpose of this page is to just document the settings that most people would want to adjust.
Accessing the router’s management interface
- You will need to be connected to the router, either wirelessly or via a direct Ethernet connection.
- In your browser, go to http://192.168.1.1/admin
- Login as admin, with the assigned password.
You should see the management screen…
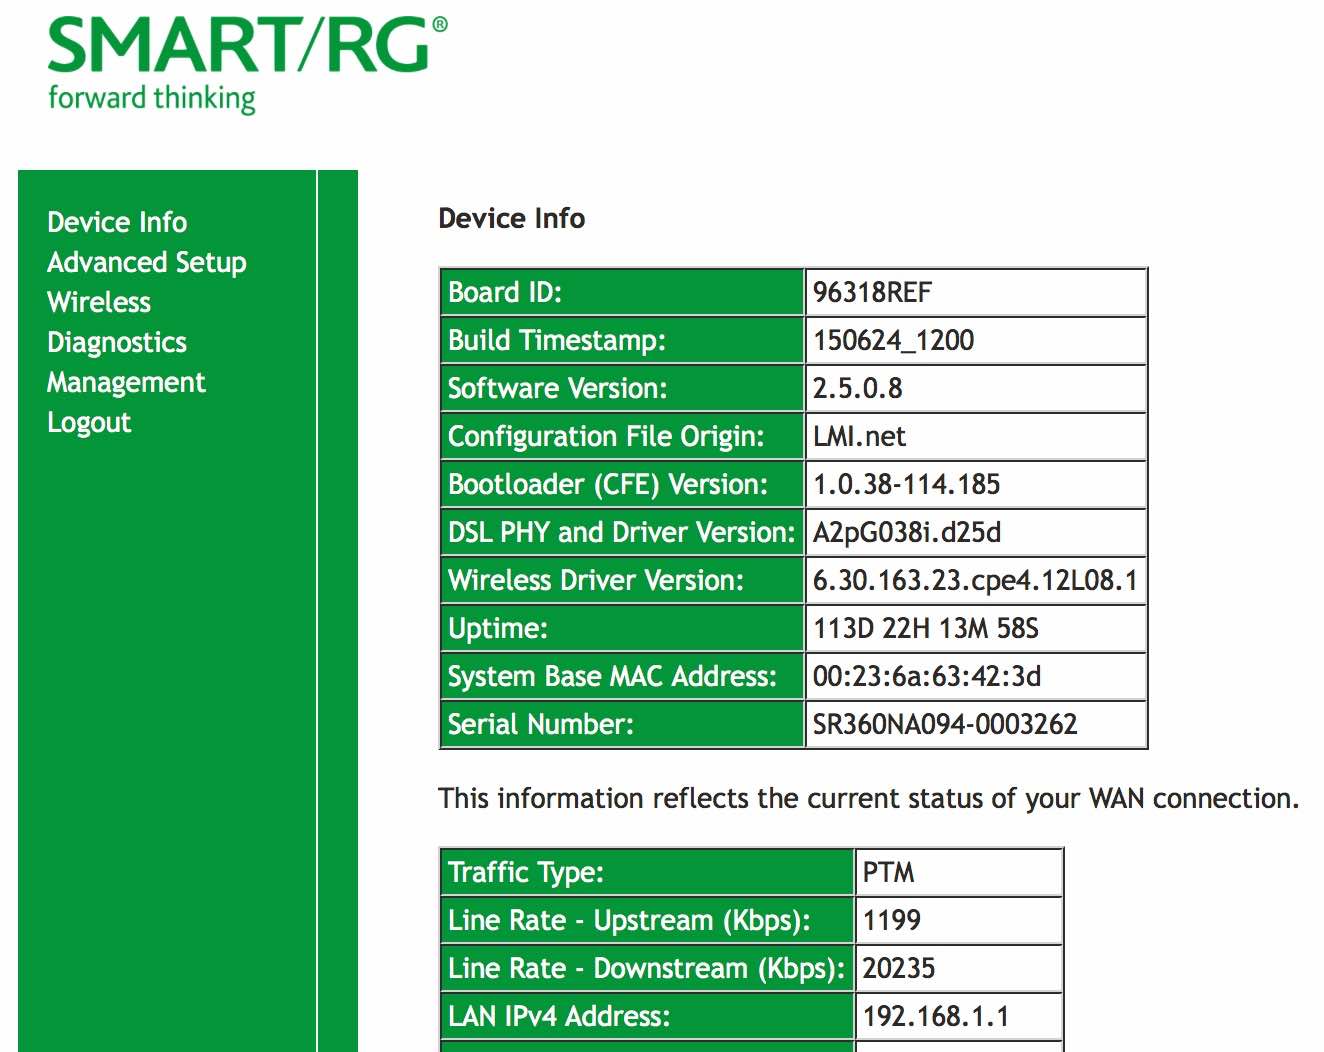
This page tells you basic information about the router. If you click the Device Info link at the left, you can get more info…
- Statistics submenu. This shows traffic on the 4 Ethernet ports, as well as wireless connections. Received traffic is data you are uploading to the internet, Transmitted is data you are downloading.
- xDSL submenu (under Statistics). The main item of interest is the Rate (Kbps). This shows you the actual sync rate of the DSL line. The Downstream speed is typically much faster than Upstream
- DHCP. This shows you a list of devices that are currently connected and have an IP address assigned by the router. Most devices will have a hostname that will help you identify the device. The MAC address is the physical hardware address of the device.
Advanced Setup
- LAN.. By default, the router’s DHCP server will use Network Address Translation (NAT) to provide private IP addresses in the 192.168.1.2 – 192.168.1.254 range. If you are using the router with an existing network with static IP addresses, you may want to change these numbers. You may also want to assign a static IP address to a printer, file server, or other device that you need to connect to. In this case, we suggest you limit the range of addresses that will be dynamically assigned. For example, set the Start IP address to 192.168.1.50. Any devices connecting with DHCP will get addresses above .50, and then you can statically assign addresses below 50 (i.e. 192.168.1.2) to devices that need to be connected to from inside your network (or outside if you have port forwarding setup)
- NAT – Virtual Servers. This is more commonly known as Port Forwarding. This enables you to connect to a device inside your network from outside your network. For example, you want to be able to connect to your home computer to access files or control the screen when you are not at home. Some computer games may also need need to have specific ports forwarded. You will need to know which TCP and UDP port numbers are used for the service.. For example, if you wanted to host your own web server, you would forward TCP port 80 to the internal IP address of the computer hosting the web site. For this reason, you would want the IP address for that computer to be statically assigned (see above)
- DSL. If you want to increase the upload (and decrease the download) speed of your DSL line, you can enable AnnexM under DSL Settings. Note that you will need to turn off Annex-M mode on our end, either by using the PHO Dashboard, or by contacting our support dept.
Wireless Settings
- Basic. This is where you assign a wireless network name (SSID). If you want to setup a guest network, you can enable one of the 3 possible networks listed and give the network a name. A guest network is useful if you want to give someone temporary access to your network without giving them your primary wireless password. You can also turn off wireless access entirely, or disable the WiFi button.. (the WiFi button enables you to toggle WiFi access using the physical WiFi button on the router). Client Isolation will prevent one device on your network from seeing any other devices. Hide Access Point will prevent the SSID from being announced. You will then need to type in the network name (along with the password) in any device you want to connect.
- Security. This is where you assign a password for your wireless network. We recommend using the default “Mixed WPA2/WPA-PSK” authentication method for compatibility with the most devices. The passphase is displayed in bullets. Click the “Click here to display” link to show it. If you have setup guest networks, you can select the guest SSID from the menu and assign a password. If “Use base MAC address as WPA passphrase” is checked, then the wireless password is the 10 character MAC address printed on the back or bottom of the router.. If the router is reset to default settings (using the pin hole reset on the back of the router), then this option will be enabled. WPS is a system that supposedly make it easier to attach printers and other devices to the wireless network without needing to use a password. This is disabled by default.
- Advanced. The main thing you might want to do on this page is change the channel the wireless radio uses. The default setting is “Auto”, which means the router will scan other wireless networks when it boots up amd select one that is not already used. This doesn’t always work, so you may want to manually specify a particular channel. Please see this postfor more info.
Diagnostics
- For those of you that are technically inclined, you can ping or trace route to remote hosts to test connectivity. This is typically done from a computer connected inside your network, but this can be very handy when you are using a tablet or smartphone that doesn’t have a command line interface.
Management
- Access Control. This is where you can set the password for the management interface. We recommend you do this. Click the Password submenu, and enter admin in the User Name field, then type the old password (presumably admin) and then type (and re-type) a new password, then click Apply/Save.
- Update Software. We recommend keeping your router running the latest firmware. You can download firmware updates here
Other tasks